

When Apple introduced Camera Control on the iPhone 16 and iPhone 16 Pro, expectations were high. Many hoped it would work like a proper camera shutter, with autofocus and a half-press, similar to what you get on a dedicated camera. That did not quite happen. Still, Camera Control can be far more useful than it first appears if you know how to use it properly.
- Getting familiar with Camera Control:
- Open a different camera app like Instagram:
- Use Camera Control to open the Magnifier:
- Ask “what the heck is that?!” with Visual Intelligence:
- Camera Control tools inside the Camera app:
- Zoom or switch cameras quickly:
- Record video instantly:
- Adjust exposure for better photos:
- Looking ahead:
Camera Control is now available on every new iPhone model except the iPhone 16e, including the iPhone 17 and iPhone Air. Even so, many people barely use it, or only notice it when they press it by mistake. With a bit of setup and practice, it can become a genuinely helpful shortcut for everyday tasks, not just photography.
Getting familiar with Camera Control:
Camera Control can feel confusing at first. It opens a small pop-up menu and behaves differently depending on which app you are using. To get the most out of it, you need to explore its settings and understand what actions are available.
All Camera Control options live inside the main Apple Settings app, not inside the Camera app itself. Open Settings, scroll down to Camera, and look for Camera Control at the top of the menu. This is where you decide what the button does and which tools it gives you access to.
Open a different camera app like Instagram:
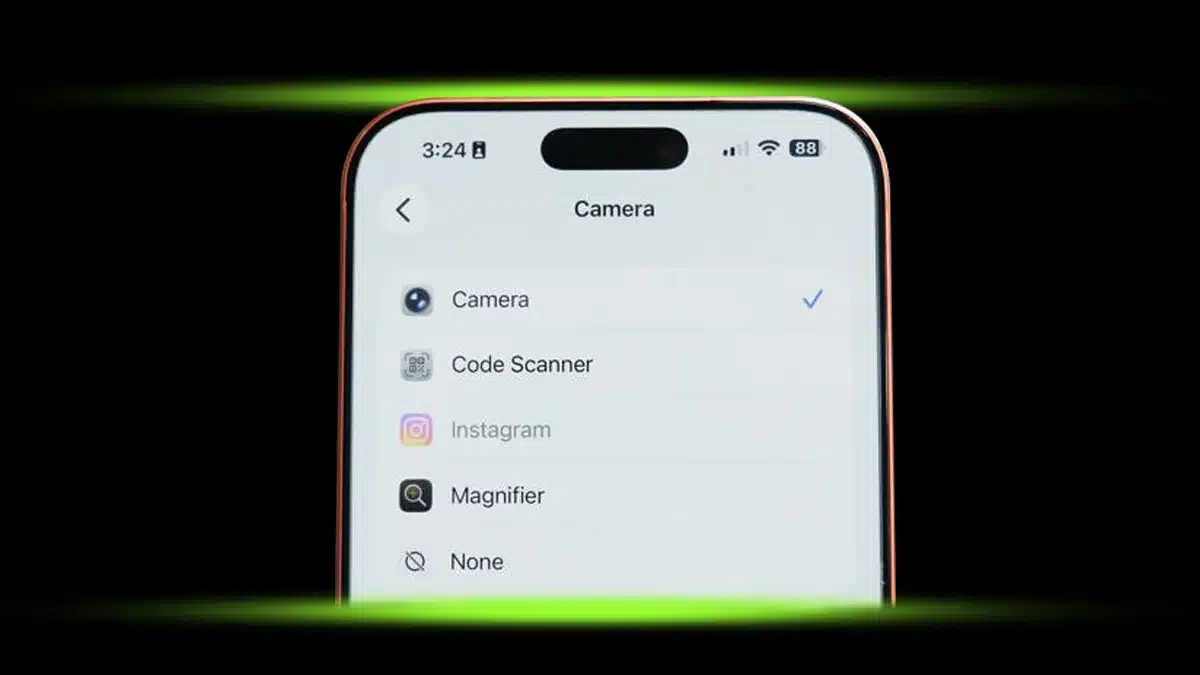
One of the most useful features is the ability to launch apps other than Apple’s Camera. Inside the Camera Control settings, the first option lets you choose which camera app opens when you press the button.
Instead of the default Camera app, you can select tools like the QR code scanner or even third-party apps. Instagram, which originally started as a camera app, can be set to open directly to its camera screen. This makes it much faster to capture and share moments without jumping through menus.
Just make sure Instagram has camera permission. If not, you can enable it by going to Settings, then Apps, then Instagram.
Use Camera Control to open the Magnifier:
If you often need help reading small text, the Magnifier app is another great option. By assigning Magnifier to Camera Control, a single press turns your phone into a digital magnifying glass.
Magnifier allows you to zoom in on text, take photos, and even send images to Apple’s reader for text recognition. It can also turn on the flashlight in low-light situations, which makes it especially useful when reading menus or labels on the go.
Ask “what the heck is that?!” with Visual Intelligence:
Camera Control also gives quick access to Visual Intelligence, Apple’s image recognition feature that works with ChatGPT. It is designed to help answer questions about what you are looking at, whether it is a plant, an object, or something unfamiliar.
To use it, press and hold Camera Control from anywhere outside the Camera app. Visual Intelligence will take a still photo and analyze it before returning results. It does not work with live video, and results can vary. Sometimes it gets things right, sometimes not, but it can still be a fun and useful tool when curiosity strikes.
Camera Control tools inside the Camera app:
Once you are inside the Camera app, Camera Control becomes even more powerful. A quick press takes a photo, but a light press brings up a small tabbed menu under your finger. Swiping down reveals a row of Camera Control features you can scroll through.
In the Settings, Camera, Camera Control menu, you can disable tools you never use. For example, the ‘Depth’ feature may not show much difference between settings, so turning it off can simplify the menu. Focusing on the tools you actually use makes Camera Control much easier to handle.
Zoom or switch cameras quickly:
Camera Control allows smooth zooming without touching the screen. Choose Zoom from the control menu, then slide your finger left or right on the button to zoom in or out.
You can also switch between cameras instead of zooming. Select Cameras from the menu and move between ultra-wide, main, and zoom lenses, or flip to the selfie camera. Scrolling past the wide lens automatically switches to the front-facing camera, which makes quick self-shots much easier.
Record video instantly:
Camera Control also lets you record video without switching modes. While the Camera app is open, press and hold the button to start recording. Release it to stop. This is ideal for capturing quick moments without navigating menus.
The on-screen shutter button works the same way. Holding it records video instead of taking a photo. If you prefer burst photos instead, you can set the Volume Up button to handle bursts in the Settings, Camera menu.
Adjust exposure for better photos:
One of the most useful Camera Control tools is Exposure. Swipe down in the Camera Control menu and scroll until you see the ‘±’ symbol labeled ‘Exposure’.
Sliding left or right lets you quickly brighten dark scenes or tone down shots that are too bright. Even small adjustments can dramatically improve how a photo looks. Keeping Camera Control set to Exposure can make a big difference, especially in tricky lighting.
Looking ahead:
Camera Control may not be the two-step shutter many photographers hoped for, but it is far from useless. With the right setup, it becomes a fast shortcut for opening apps, examining details, adjusting camera settings, and capturing photos or videos more efficiently.
As Apple continues to refine its software, Camera Control could become even better. For now, learning how to use it properly can turn an overlooked feature into one of the most practical tools on your iPhone.
ALSO READ: 3 Underrated Apple Watch Features Most Users Miss