

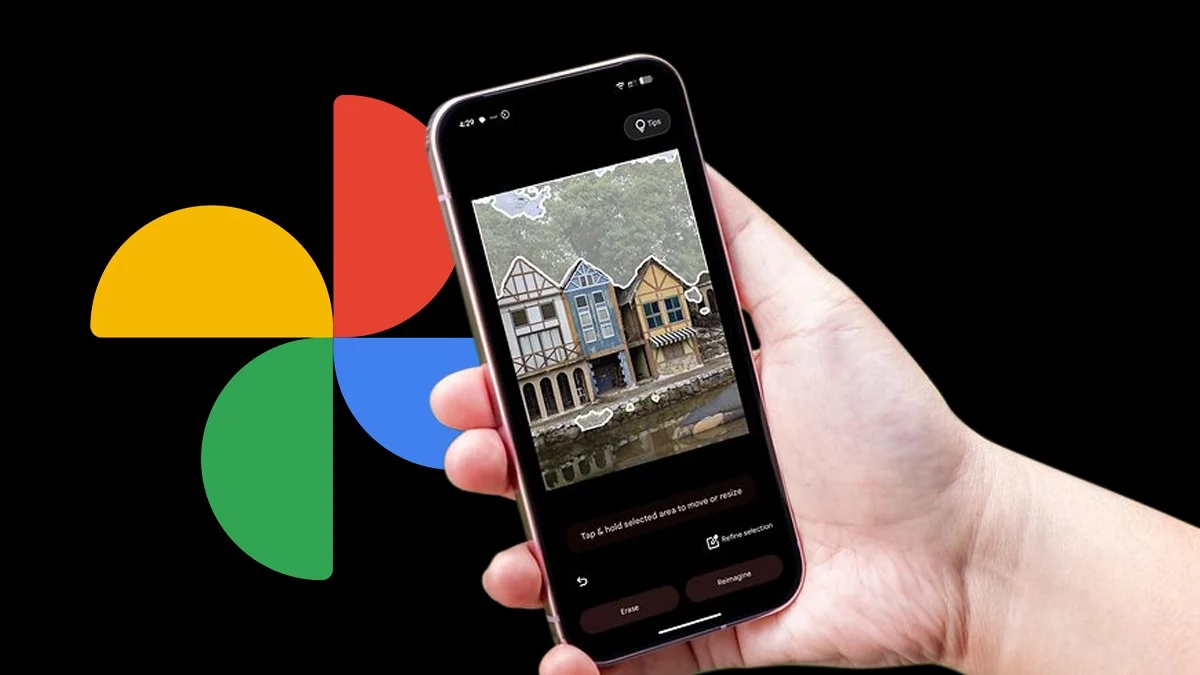
If you’ve updated your phone to Android 16, you’ll notice that Google Photos has a brand-new editing layout. When you open a photo and tap Edit, the interface looks cleaner and more organized than before.
- Removing Objects with Magic Eraser
- Sharpening Photos with Photo Unblur
- Creating AI Magic with Reimagine
- Framing Photos Automatically with Auto Frame
- Moving and Resizing Parts of a Photo
- Enhancing Zoomed-In Shots with Zoom Enhance
- Quickly Improve Photos with AI Enhance
- Making the Most of the New Editor
- The Best Google Photos Experience on Pixel 10
Instead of a single Magic Editor button, there’s now a new toolbar with tabs like Auto, Actions, Markup, Filters, Lighting, and Color. You’ll also spot a Search button that lets you quickly find any editing tool you need. It’s especially handy if you can’t remember where something is located.
While the Magic Editor name is gone, its features are still here under new names. When you tap or circle part of your photo, you’ll see options for Erase, Move, and Reimagine. The Magic Eraser tool now handles object removal, while Move and Reimagine let you tweak and transform your photo creatively. The Auto frame option has been moved to the Crop tool inside the Actions tab.
At the moment, only Android users get this new editor. If you’re using Google Photos on iOS, you’ll still see the old layout with the Magic Editor included.
Removing Objects with Magic Eraser
Magic Eraser is your tool for cleaning up photos by removing unwanted objects or distractions. Here’s how to use it:
-
Open Google Photos and choose the photo you want to edit.
-
Tap Edit in the toolbar.
-
Go to the Actions tab and select Magic Eraser, or simply tap or circle the object and press Erase.
-
Circle or tap what you want to remove.
-
Tap Erase to remove it, or use Deselect or Refine selection if needed.
-
Tap the checkmark to confirm or the back button to try again.
-
Tap Save as copy to keep your edited version.
Sharpening Photos with Photo Unblur
Blurry images don’t have to stay that way. Photo Unblur uses AI to clean up motion blur and sharpen your pictures. It’s great for improving older shots.
-
Open Google Photos and pick your photo.
-
Tap Edit.
-
Open the Actions tab and select Photo Unblur.
-
Use the slider to adjust the effect, then tap Save as copy to save your improved photo.
Creating AI Magic with Reimagine
Reimagine lets you take photo editing to the next level. It can completely change your picture by adding, modifying, or enhancing objects using generative AI.
-
Open Google Photos and select a photo.
-
Tap Edit.
-
Tap or circle the part you want to modify and choose Reimagine.
-
Type a prompt into the Reimagine box and tap the arrow to continue.
-
Pick your favorite option and tap the checkmark when you’re happy, or type a new prompt to try again.
-
Tap Save as copy to keep the new version in your gallery.
Framing Photos Automatically with Auto Frame
If cropping feels like a guessing game, Auto frame can do it for you. It automatically suggests the best way to frame your photo.
-
Open Google Photos and pick a photo.
-
Tap Edit.
-
Go to the Actions tab and select Crop.
-
Tap Auto frame.
-
Wait for the tool to generate options, then choose your favorite.
-
Tap the checkmark and Save as copy to save it.
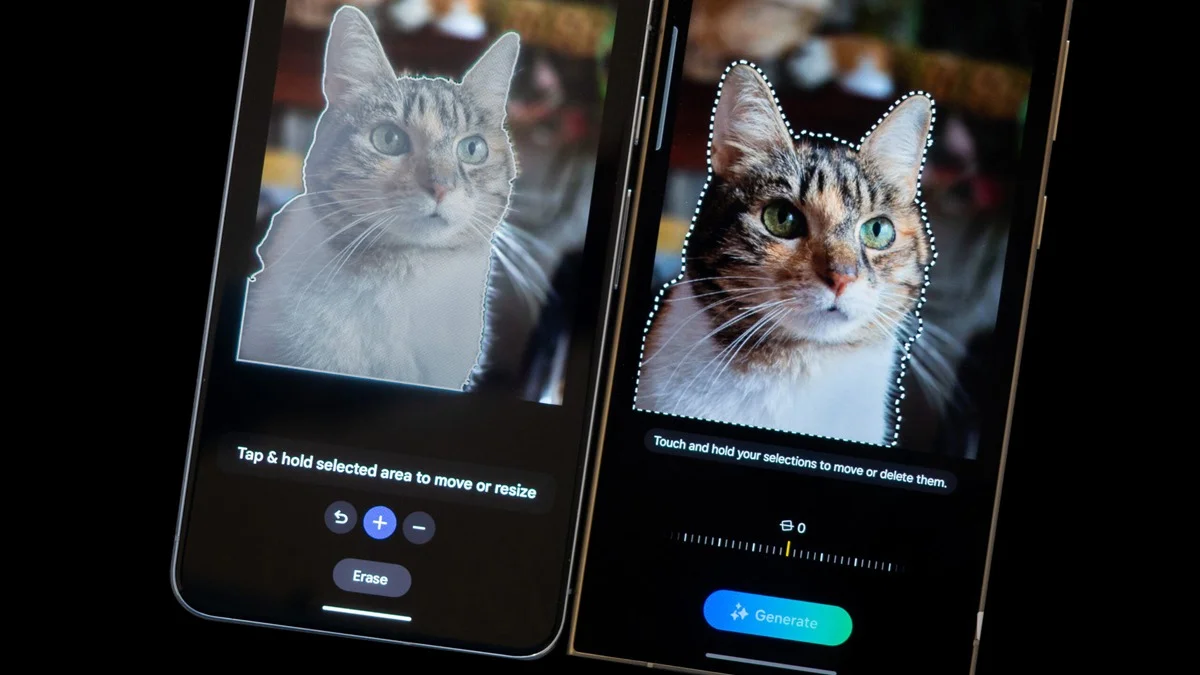
Moving and Resizing Parts of a Photo
The Move tool makes it easy to reposition or resize parts of an image for better composition. Here’s how it works:
-
Tap Edit in the toolbar.
-
Tap or circle the area you want to move and select Move.
-
Touch and hold to drag it where you want, and pinch to resize. Tap Move again when done.
-
Press the checkmark to confirm, or the back button to try again.
-
Tap Save as copy to save your edit.
Enhancing Zoomed-In Shots with Zoom Enhance
When you zoom into a photo, it can lose quality. Zoom Enhance fixes that using AI to sharpen details and remove graininess for a smoother look.
-
Open Google Photos and choose your image.
-
Tap Edit.
-
Go to the Actions tab and select Zoom Enhance.
-
Zoom in and tap Enhance Details.
-
When it’s finished, tap the checkmark and hold to compare with the original.
-
Tap Save as copy to keep the enhanced photo.
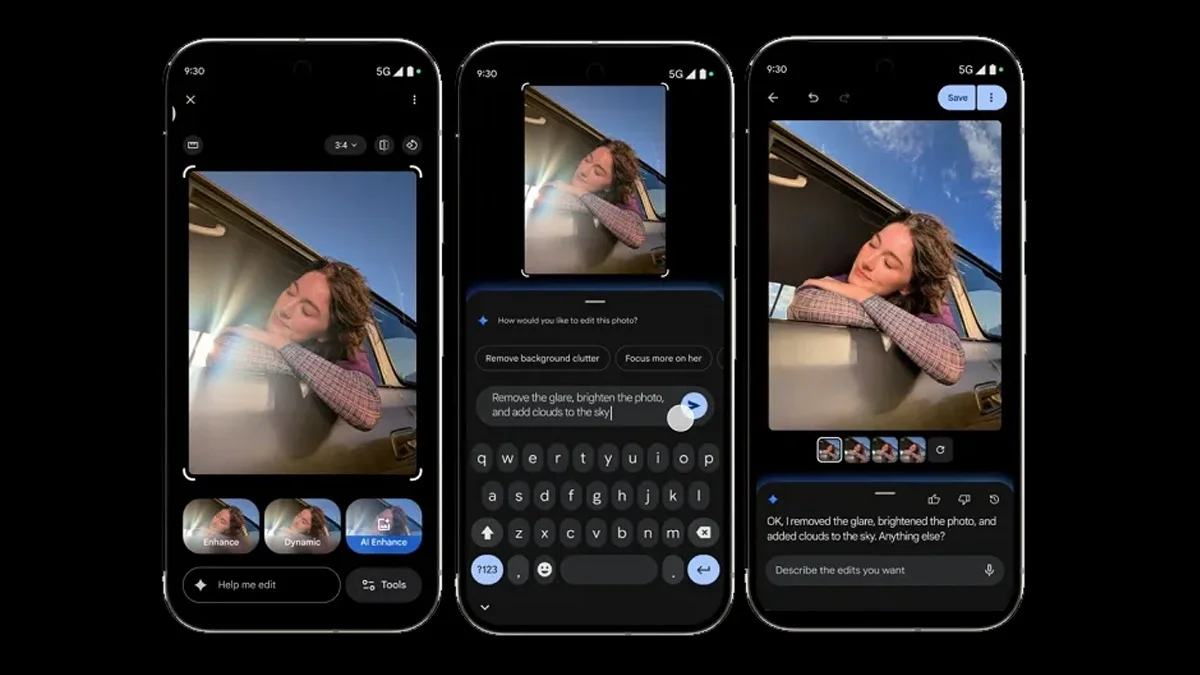
Quickly Improve Photos with AI Enhance
AI Enhance is perfect when you want a quick boost. It automatically improves lighting, colors, and sharpness all at once.
-
Open Google Photos and pick a photo.
-
Tap Edit.
-
Select AI Enhance to apply instant improvements.
-
Browse the options and tap Save as copy when you’re happy with the result.
Making the Most of the New Editor
The new search bar in the Google Photos editor is one of the best ways to find tools quickly. When you open it, you’ll see a scrollable list of editing options that’s easier to explore than the toolbar. As you start typing, it narrows down the results to match your search.
Google has confirmed that Magic Editor isn’t really gone, just divided into Magic Eraser, Auto frame, Move, and Reimagine. These tools now work as separate but powerful features that offer the same advanced editing options in a cleaner layout.
For the smoothest experience, you might need a Google Pixel phone or a Google AI Pro subscription to access every feature.
The Best Google Photos Experience on Pixel 10
If you want the full set of AI editing tools, the Pixel 10 is your best choice. Along with everything mentioned above, it includes Camera Coach, which helps you take better photos even before you press the shutter button.
ALSO READ: How To Recover Android Data Easily Even With A Cracked Or Black Screen