


How To Take Professional Photos Using The iPhone 16 Pro
The iPhone 16 Pro has redefined smartphone photography. With its advanced triple-lens system, 48MP ProRAW support, and new AI-driven image processing, you can now capture DSLR-quality photos right from your pocket.
Contents
- How To Take Professional Photos Using The iPhone 16 Pro
But having great hardware is only half the story. To truly take professional photos with your iPhone 16 Pro, you need to understand how to use its tools effectively. This step-by-step guide will help you shoot like a pro, from setup to editing.
Step 1: Prepare and Plan Your Shot
Before tapping the shutter, think like a photographer.
Understand Lighting
- Use soft natural light whenever possible, mornings and evenings offer the best tones.
- Avoid direct sunlight to prevent harsh shadows.
- Indoors? Position your subject near a window for natural light.
Choose Your Background
- Keep it simple and clean. A cluttered background distracts.
- Use a contrasting background to make your subject pop.
- Try creating depth by keeping your subject a few feet away from the background.
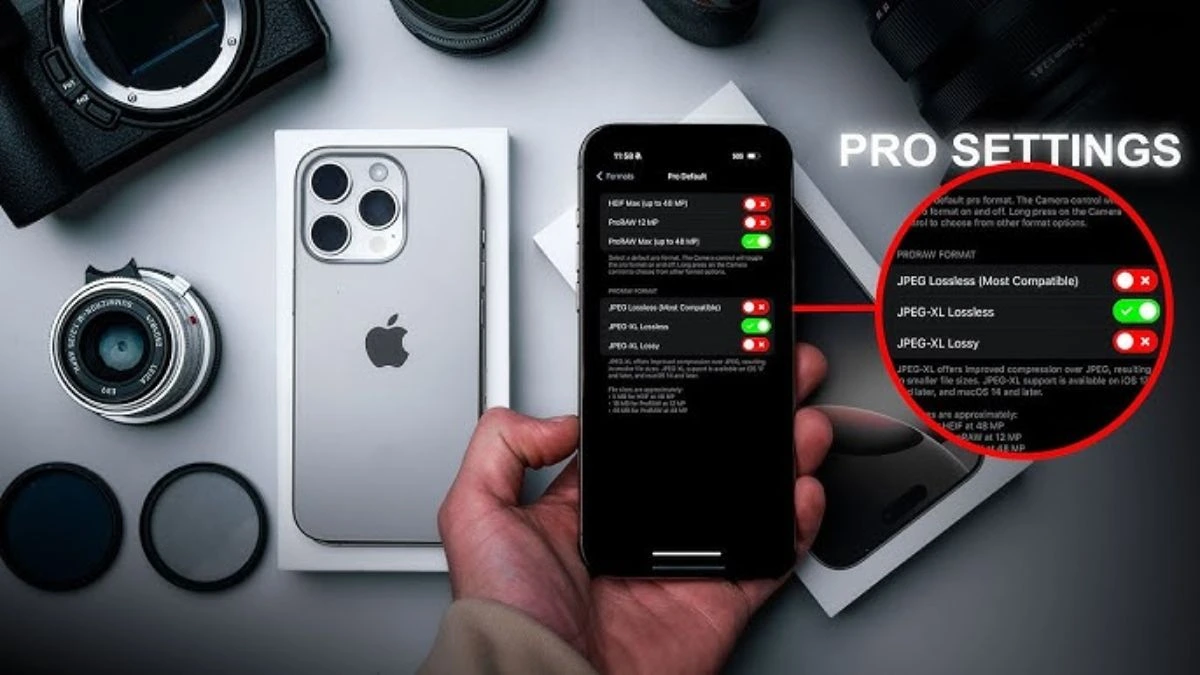
Step 2: Set Up the Camera Interface
- Open the Camera app.
- Switch to Photo Mode.
- Enable ProRAW for maximum detail.
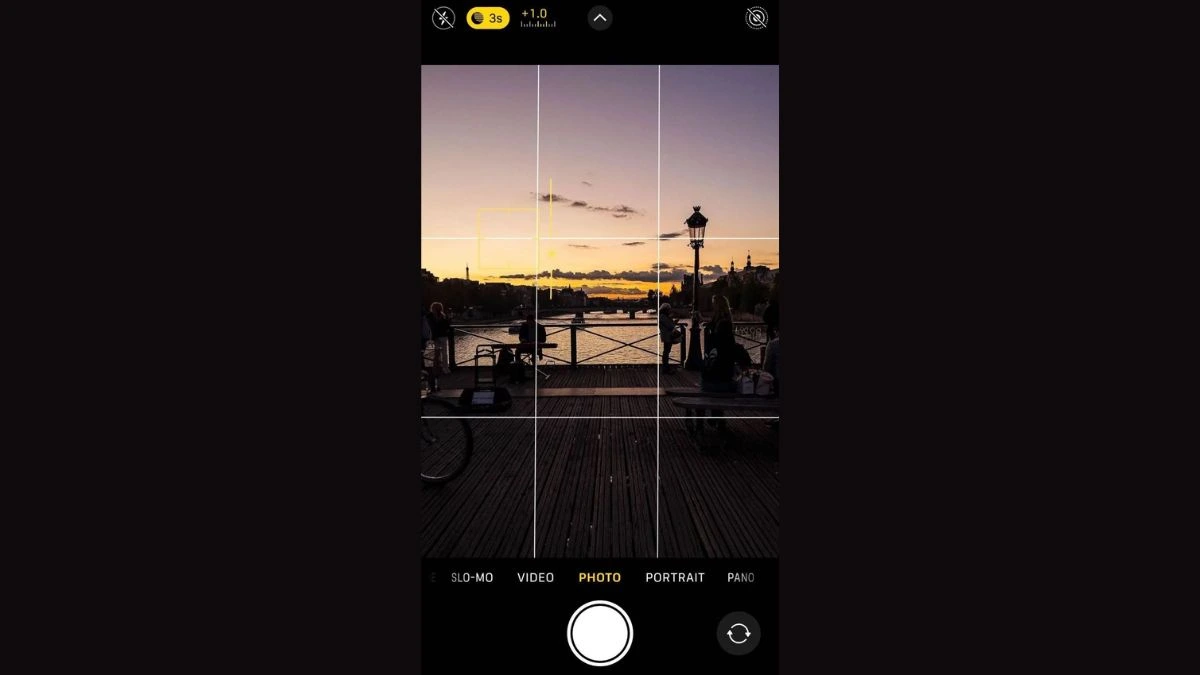
- Tap to lock focus and exposure, drag the sun icon up or down to adjust brightness.
- Use grid lines (Settings – Camera – Grid) to follow the rule of thirds.
- Enable Portrait Mode for professional depth-of-field effects.
Step 3: Compose Your Frame
- Follow the rule of thirds – align key elements along the grid lines.
- Add leading lines like roads or fences to draw attention.
- Try different angles – crouch, tilt, or shoot from above for creative perspectives.
Step 4: Focus, Exposure, and Stability
- Tap your subject to focus, and hold to lock AE/AF.
- Adjust exposure manually using the slider.
- Use a tripod or rest your elbows on a surface for stability.
- For motion, use burst mode (hold shutter button).
- In low light, let Night Mode automatically activate.

Step 5: Shoot and Evaluate
- Take multiple shots from different angles.
- Switch between lenses (main, ultra-wide, telephoto) for variation.
- Review each image’s sharpness, lighting, and composition.
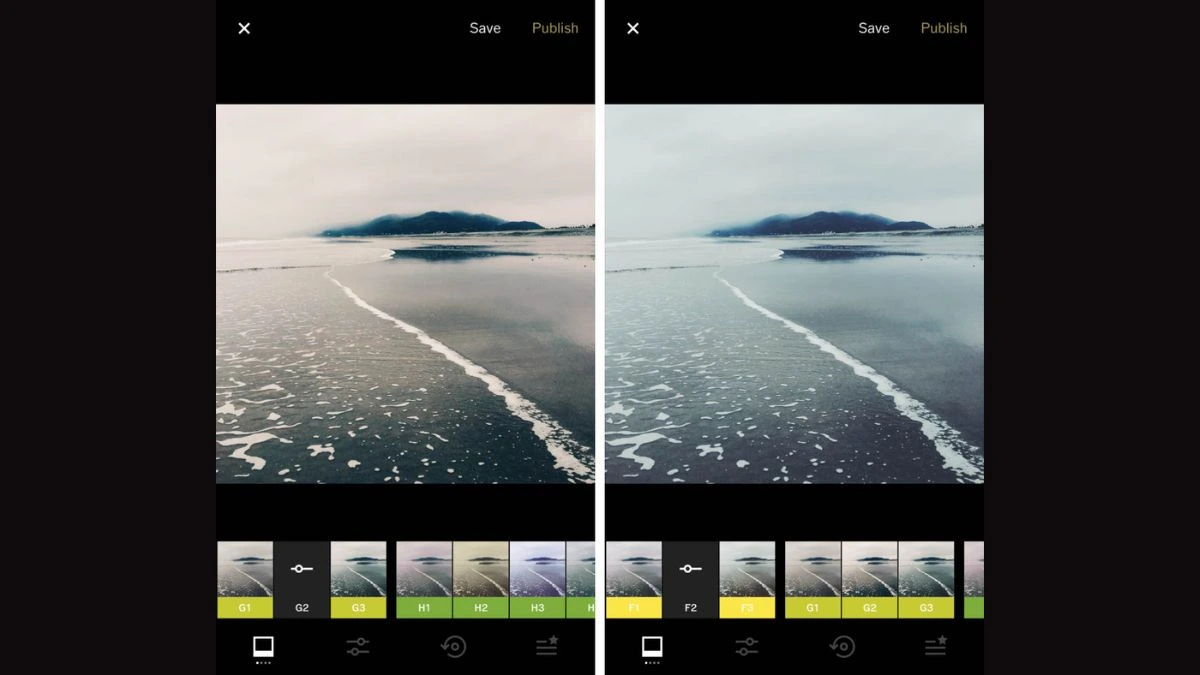
Step 6: Edit Like a Professional
Editing refines your photos. Use the Photos app, Lightroom Mobile, or Snapseed.
Adjust These Key Settings:
- Exposure / Brightness – fix under or overexposure.
- Contrast / Shadows – add depth.
- White Balance – ensure natural color tones.
- Sharpness / Clarity – add crispness.
Pro Tip:
Shoot in ProRAW and export to JPEG or TIFF after editing for best quality.
Step 7: Save and Share
- Export at full resolution for prints.
- Compress only when sharing on social media.
- Add subtle filters to enhance mood, avoid over-editing.
Bonus Tips for iPhone 16 Pro Users
- Use Photographic Styles to match your creative tone.
- Try Cinematic Mode for creative portraits.
- Use the 5x telephoto lens for close-up portraits.
- For moving subjects, use Live Photos to choose the best frame later.
- Explore third-party camera apps like Halide or Moment for manual controls.
Also Read- Top 7 Smartphone Brands In China: Market Leaders And Innovations In 2025