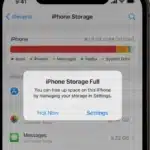





If you’re an iPhone user, you might find your storage filling up quickly due to high-resolution photos. As iPhone cameras improve, so does the size of the images they capture. Whether you want to save storage or share a smaller photo, this guide will show you how to reduce photo size on your iPhone. Let’s explore the various methods step by step.
Reduce Photo Size in iPhone Settings
The easiest way to reduce photo size is through your iPhone’s settings. Here’s how to do it:
- Open the Settings app.
- Go to Camera → Formats.
- Select High Efficiency to store photos in high quality with a smaller file size.
- Under Photo Capture, select HEIF Max (Up to 48MP), which limits photos to 5MB each.
| Step | Action | Result |
|---|---|---|
| 1 | Open Settings | Access to settings options |
| 2 | Navigate to Camera → Formats | Choose format preferences |
| 3 | Select High Efficiency | Saves space with smaller file sizes |
| 4 | Choose HEIF Max (Up to 48MP) | Further reduces file size to under 5MB |
Decrease Photo Size in Mail App
When sending a photo via email, the attachment size can be reduced. Here’s how:
- Open the Mail app and compose a new email.
- Attach a photo from your gallery.
- When you hit Send, a pop-up will ask for the image size.
- Choose a smaller size, such as Small, Medium, or Large.
| Step | Action | Result |
|---|---|---|
| 1 | Open Mail app | Start a new email |
| 2 | Attach a photo | Add your photo to the email |
| 3 | Press Send | Select size options |
| 4 | Choose size | Reduce photo size for sharing |
Reduce Photo Size in WhatsApp
WhatsApp offers settings to reduce photo size when sharing images:
- Go to WhatsApp Settings.
- Navigate to Storage and Data → Media Upload Quality.
- Choose Standard Quality to reduce photo sizes.
If you want to change the quality for a single image:
- Select the photo in a chat.
- Tap the HD button.
- Choose Standard and send.
| Step | Action | Result |
|---|---|---|
| 1 | Open WhatsApp | Adjust quality in settings |
| 2 | Select Storage and Data | Choose photo quality |
| 3 | Set to Standard Quality | Reduce photo size for all uploads |
Decrease Photo Size Using Optimise iPhone Storage
To automatically reduce photo sizes, you can use the Optimise iPhone Storage option:
- Open Settings and tap your name.
- Go to iCloud → Photos.
- Enable Sync This iPhone.
- Select Optimise iPhone Storage.
This stores full-resolution images in iCloud and keeps smaller versions on your iPhone, saving space.
| Step | Action | Result |
|---|---|---|
| 1 | Open Settings | Manage iCloud settings |
| 2 | Go to iCloud → Photos | Enable sync |
| 3 | Tap Optimise iPhone Storage | Compresses photos locally |
Reduce Photo Size with Third-Party Apps
There are several third-party apps available that can reduce the size of existing photos. One popular option is Photo Compress – Shrink Pics. Here’s how to use it:
- Download Photo Compress from the App Store.
- Open the app and grant access to your photos.
- Select the image you want to compress.
- Adjust the compression level and save the photo.
| App | Action | Result |
|---|---|---|
| Photo Compress | Select photo | Compress and save |
| Adjust quality | Use slider | Choose the level of compression |
| Save photo | Compress | Reduced file size available in Photos |
Conclusion
Reducing photo size on your iPhone can free up valuable storage space and make sharing easier. Whether you adjust your settings, use apps, or optimize through iCloud, there are plenty of options available. Give these methods a try and see how much space you can save!
Which method works best for you? Let us know in the comments.
ALSO READ: Why Apple Removed iPhone SE and iPhone 14 from EU Market