


Scheduling messages on WhatsApp is a great way to stay organized. It helps you send birthday wishes, reminders, or important updates, even if you forget about them. Though WhatsApp doesn’t have a built-in feature for scheduling messages, you can use third-party apps to do this. This guide will show you how to schedule messages on WhatsApp using simple steps. Let’s dive in!
- How To Schedule Messages on WhatsApp (For Android Users)
- Step 1: Download and Install SKEDit
- Step 2: Open the App Dashboard
- Step 3: Schedule a New Message
- Step 4: Grant Permissions
- Step 5: Set Your Phone Timeout
- Step 6: Compose and Schedule Your Message
- How To Schedule Message On WhatsApp (For iPhone Users)
- Step 1: Open the Shortcuts App
- Step 2: Create a New Automation
- Step 3: Add the Action
- Step 4: Configure the Message
- Step 5: Test the Automation
- How To Schedule Messages on WhatsApp Web
- Conclusion
How To Schedule Messages on WhatsApp (For Android Users)
To schedule a WhatsApp message on Android, you need the SKEDit app. It’s free to download from the Google Play Store. The app also has a paid version, but the free one is enough for basic scheduling.
Step 1: Download and Install SKEDit
Search for SKEDit in the Google Play Store and install it. After that, open the app. You can choose to sign up or skip the sign-in process.
Step 2: Open the App Dashboard
Once installed, the app will show the main dashboard. From here, you can see your upcoming scheduled messages, as well as sent, undone, deleted, or failed messages.
Step 3: Schedule a New Message
Tap the + icon at the bottom of the screen. Then, choose WhatsApp as the type of message you want to send.
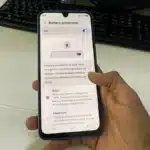
Step 4: Grant Permissions
The app will ask for some permissions. These include:
- Accessibility settings
- Drawing over the screen
- Unlocking your phone to send messages
Please note that the app can only unlock phones with passwords or PINs, not fingerprints or patterns. It will also access the information shown on your screen.
Step 5: Set Your Phone Timeout
To make sure your phone locks after sending the message, adjust the screen timeout to at least 30 seconds.
Step 6: Compose and Schedule Your Message
Choose a contact from your WhatsApp list. Write your message and add any attachments (like images or documents). Set the date and time you want the message to be sent. After this, tap the checkmark in the top-right corner.
The premium version of SKEDit offers more features, but the free version works well for basic scheduling.
How To Schedule Message On WhatsApp (For iPhone Users)
If you’re using an iPhone, the Shortcuts app is an easy way to schedule WhatsApp messages. Here’s how to do it:
Step 1: Open the Shortcuts App
Open the Shortcuts app on your iPhone. Make sure WhatsApp is closed. At the bottom, tap on the “Automation” tab.
Step 2: Create a New Automation
Tap the ‘+’ button in the top-right corner. Then, select ‘Create Personal Automation.’ Choose “Time of Day” as the trigger. Set the time when you want the message to be sent. You can choose to repeat this daily, weekly, or monthly. Tap “Next.”
Step 3: Add the Action
Tap ‘Add Action’ and select ‘Apps.’ Find WhatsApp in the list and select it. Then, choose the action ‘Send Message.’
Step 4: Configure the Message
In the action panel, tap ‘Message’ and write your message. Tap ‘Recipients’ to select the person or group you want to send it to. Finally, tap ‘Done.’
Step 5: Test the Automation
To check if everything is set up correctly, tap the ‘Play’ button in the bottom-right corner. Open WhatsApp to confirm that the message was sent.
How To Schedule Messages on WhatsApp Web
If you prefer using WhatsApp Web, you can schedule messages using the Blueticks extension. Here’s how:
Step 1: Install the Blueticks Extension
Go to the Chrome Web Store and install the Blueticks extension. After installing, open WhatsApp Web on your browser and log in.
Step 2: Schedule the Message
Open the chat where you want to send the message. Click on the Blueticks icon in your browser. Then, select the date and time for your message. Type your message and click “Schedule Send.”
Conclusion
Now you know how to schedule messages on WhatsApp! While WhatsApp doesn’t offer this feature natively, using third-party apps like SKEDit (for Android) or the Shortcuts app (for iPhone) makes it easy. If you are using WhatsApp Web, Blueticks is a great option. Start scheduling your messages and make your communication effortless.
ALSO READ: How to Schedule a Message on Instagram: Step-by-Step Guide